Product Variants
Many products are available in different styles and variations, such as color or size. On your B2B Wave platform, you can set up different options for products, give them different prices and codes (SKUs), assign different quantities and images to them, and make it easier for customers to find specific variants by searching for their SKUs on your storefront.
Below, you will find how to add and manage product variants and how to assign them in bulk by importing them to your B2B eCommerce platform.
Creating Product Options
To add variants to your products, you need to follow these steps:
Step 1. Go to Products >Options, then click “New product option group.”

Step 2. Fill in the necessary information on the “New product option group” page.

Specifically, on this page you will encounter the following fields:
| Name | Enter the name of the option you want to create (e.g., Size) |
| Code | Add a code name for the option (e.g., SZ) |
| Type | Choose the appropriate option from the drop-down menu. Here you will find the following selections:
|
| View Order | Specify the order for this option to appear on your B2B portal’s product listings. For example, if you want it to appear first on your homepage, set the value to “0”, if you want it to appear second, set the value “1”, and so on
 |
| Is required | Check this box if you require customers to select a product variant when placing orders
|

Step 3. Once you’ve added your variant values, click “Save.”
Adding Product Variants to Existing Products Manually
Once you set your product options, it’s time to assign them to the products for which you offer variants. Remember that you can create variants only for product options whose type is “List of Values.” Let’s see how you can do this.
Step 1. Go to Products >Products and click on the product you want to add variants.
Step 2. On the “Editing product” page, look for the “Product Options” tab. Then, click on “+” and select the appropriate option from the drop-down menu. Remember that you can add up to two (2) options per product.

Step 3. Go to the “Code & price variants” tab. Check the product option(s) you want to add to the product, and then click “Create Code & Price Variants” to generate variations based on your selected options. You can also choose which product variant values you want to enable here. For each variant, you can:
- Choose if the variant is active or not
- Add a unique variant code
- Input inventory quantity
- Specify variant prices for multiple price lists at once
- Upload images

NOTE: The product’s pricing on your storefront will automatically change to match the price you set for the selected variant to ensure customers see the right price.
Step 3. Once you’ve created your variations, click “Save.” The product listing on your storefront will now reflect these too.

Adding Product Variants to Existing Products in Bulk
Before mass importing product variants for the first time, remember that you must first create or import products and product options.
To upload product variants for the first time, complete these steps:
Step 1. Go to Tools >Import Product Variants and click “Sample file import” to download the sample file.

Step 2. Open the spreadsheet and fill in the necessary information.

Specifically, you need to fill out the following:
| product_sku | Enter the main product’s code (e.g., KN0003) |
| variant_sku | Insert the product variant's code (e.g., KN0003-BL) |
| option_set | Add the list of product options that apply to this product, using a comma (,) to separate them (e.g., Color,Size) |
| Product options (based on your options) | Insert each product option in the appropriate “option_set” column and specify which options you want the product to inherit (e.g., if you have added color as an option, the column's name will be “Color” and a possible variant could be “Black”) |
| quantity | Add the inventory quantity for this product variant. Note that this does not currently sync with the main product’s quantity |
| active | Type “1” to specify that the variant is active on your B2B store or “0” if the product is inactive
|
| price | Enter the product variant's price for a specific price list |
NOTE: Remember to create a new row for each variant in your spreadsheet if a product has multiple variants.
Step 3. Go to Tools >Import Product Variants, and choose the relevant price list you want to mass import product variants and their pricing from the “Price List” drop-down menu. Then, click “Choose File” to upload your file, and click “Import.” Remember that your file should be in .xlsx format.
Exporting Product Variants
To export your existing product variants, follow these steps:
Step 1. Go to Tools >Import Product Variants on your Admin Dashboard and click “Export Product Variants.”
Step 2. Choose from the available options on the “Export Product Variants” page and click “Export.”

Specifically:
| Price List | Select the appropriate price list from the drop-down menu |
| Category | Choose the appropriate option from the drop-down menu. Remember to choose “All” if you want to download all product categories |
| Active variants? | Select the appropriate option from the drop-down menu to export: (a) all products, or only (b) active or (c) inactive product variants |
| Active products? | Select the appropriate option from the drop-down menu to export: (a) all products, or only (b) active or (c) inactive products
|
Updating Product Variants in Bulk
You can update product variants in bulk by downloading and re-uploading them on our B2B eCommerce platform. To do this:
Step 1. Go to Tools >Import Product Variants, click “Export Product Variants,” select the appropriate price list and options on the “Export Product Variants” page, and click “Export.”
Step 2. Make the necessary changes to the file, then import this new file through Tools >Import Product Variants. Remember that your file should be in .xlsx format. Below, you will find the columns included in the downloaded spreadsheet.
| product_sku | Corresponds to themain product’s code (e.g., SKU1) |
| b2b_product_id | Refers to the main product’s identification code used internally on B2B Wave |
| product_name | Corresponds to the main product's name |
| variant_sku | Reflects the product variant's code (e.g., SKU1L) |
| b2b_variant_id | Refers to the variant’s identification code used internally on B2B Wave |
| option_set | Refers to the list of product options that apply to this product. If multiple options are available for this product, these will appear here with a comma (,) separating them (e.g., Color,Size)
|
| Product options (based on your options) | Each product option will appear in separate columns on the spreadsheet. Use these columns to update product variants |
| quantity | Corresponds to the inventory quantity for this product variant. Use this column to update the relevant amount. Note that this does not currently sync with the main product quantity |
| active | Corresponds to whether the product variant is active or inactive on your B2B store. To update this information, use values “1” (active) and “0” (inactive), respectively |
| price | Refers to the product variant's price for the selected price list. Use this column to update the variant’s pricing |
NOTE: You can upload product variant images in bulk. To do so, add a column at the end of your exported spreadsheet named “gallery_image_url1,” and insert the image’s URL in the relevant cell. Find out more about mass-uploading photos in our dedicated article.

Searching for Product Variants by SKU
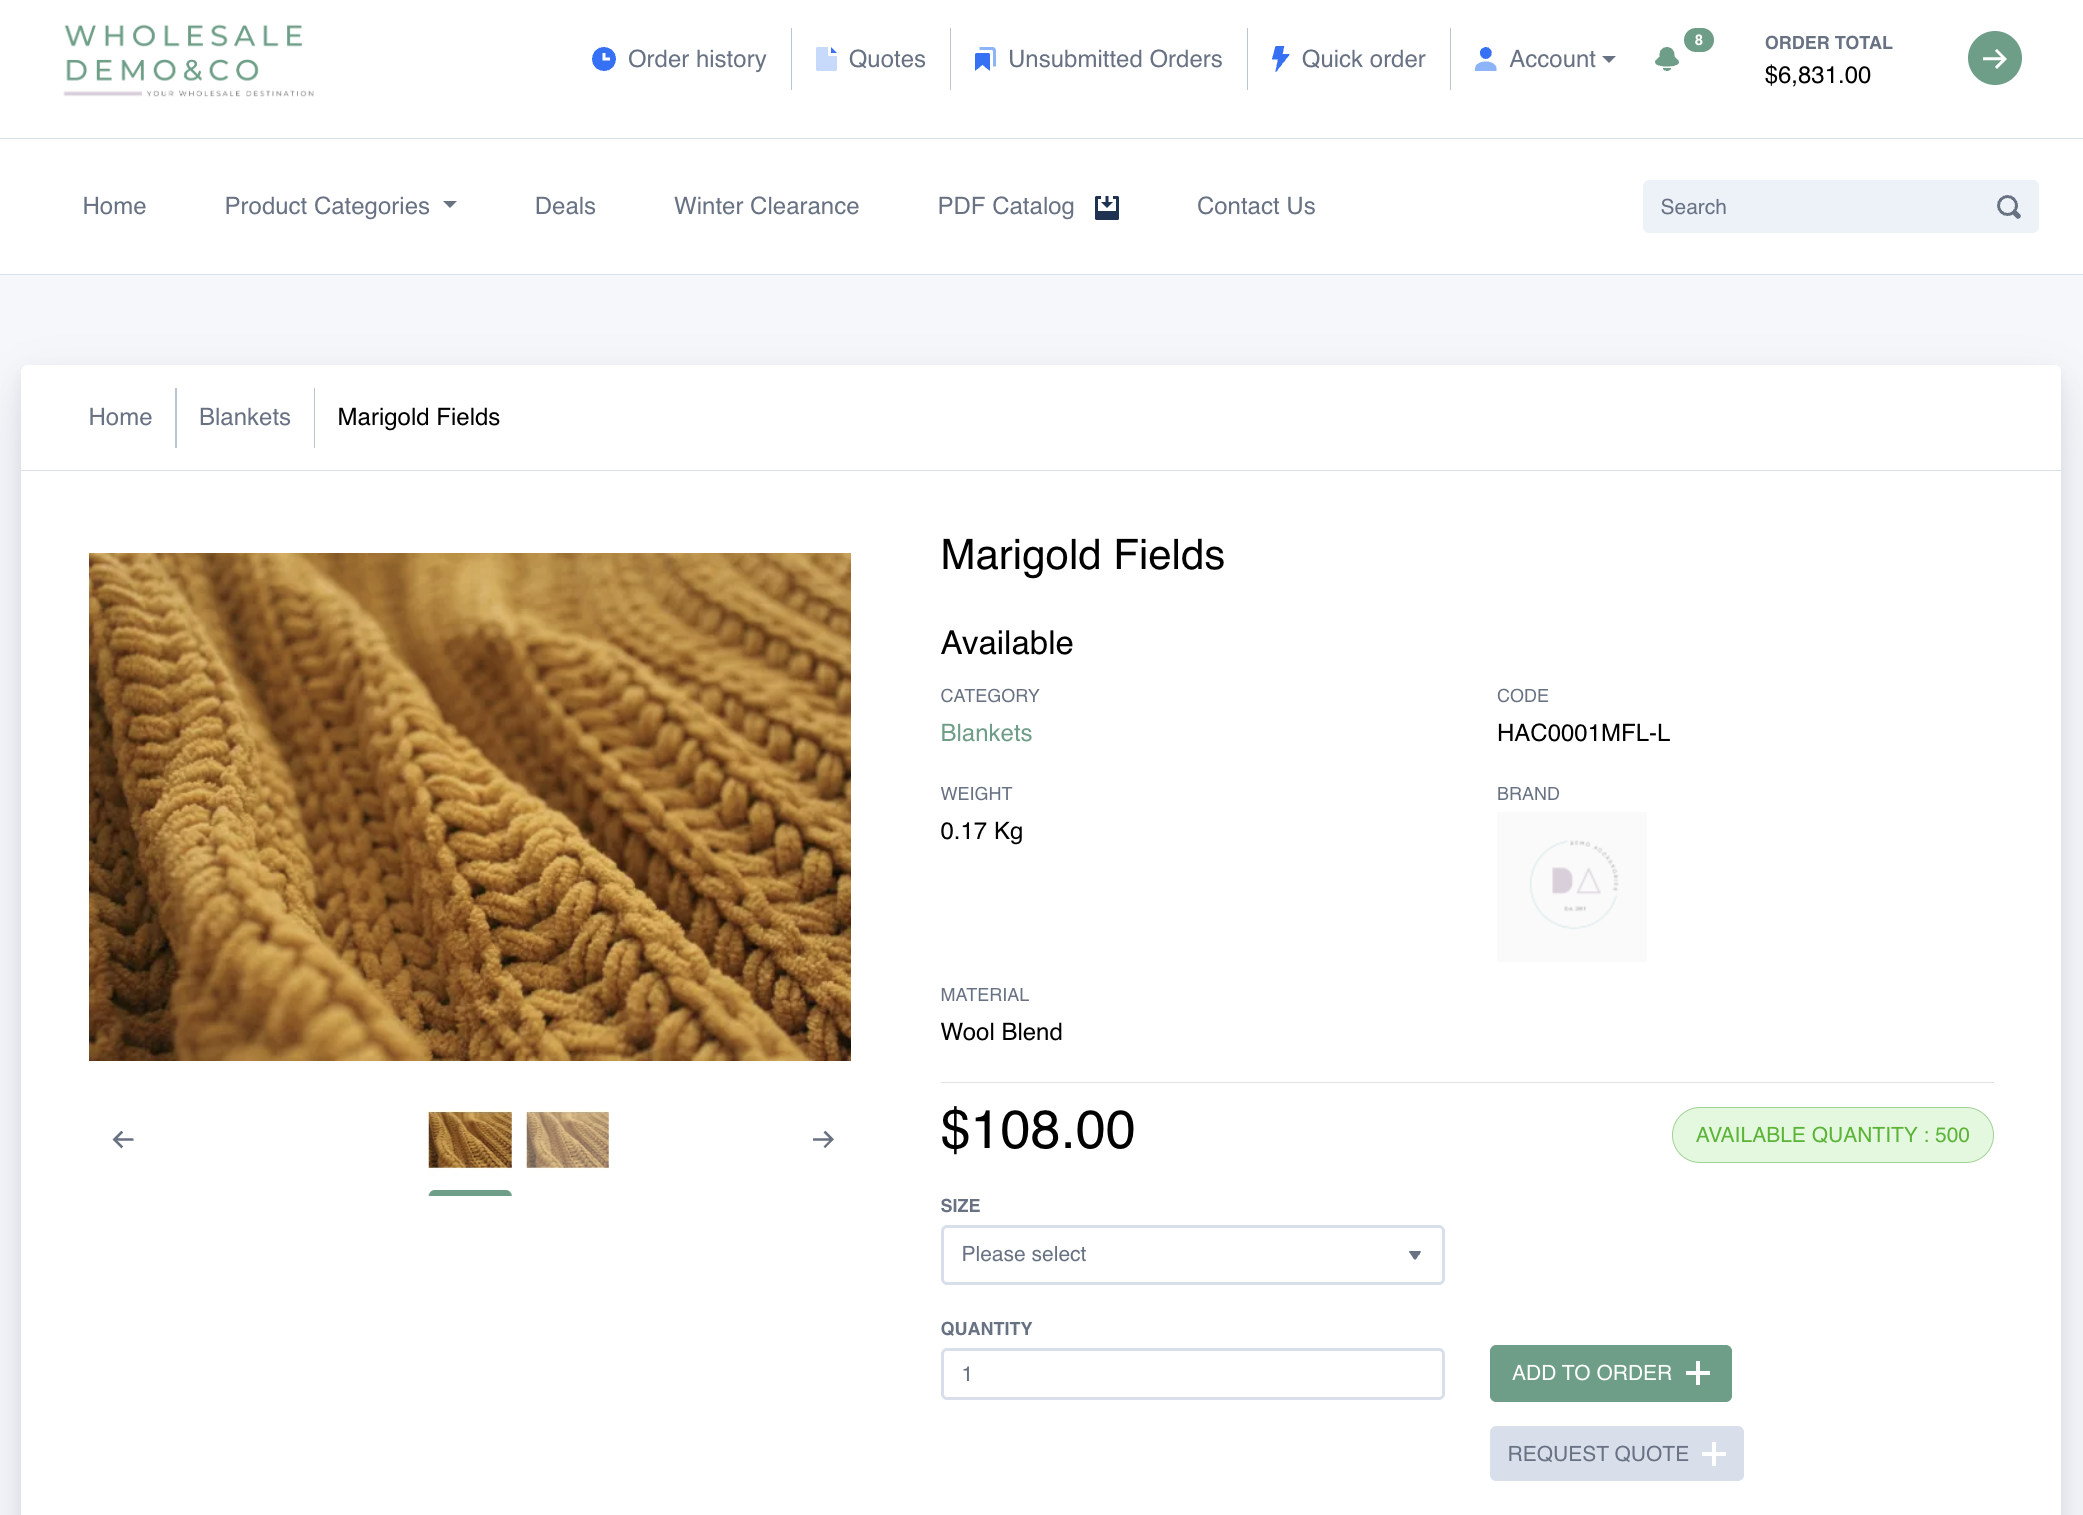
Customers can easily search for product variants by SKU directly on your B2B storefront.
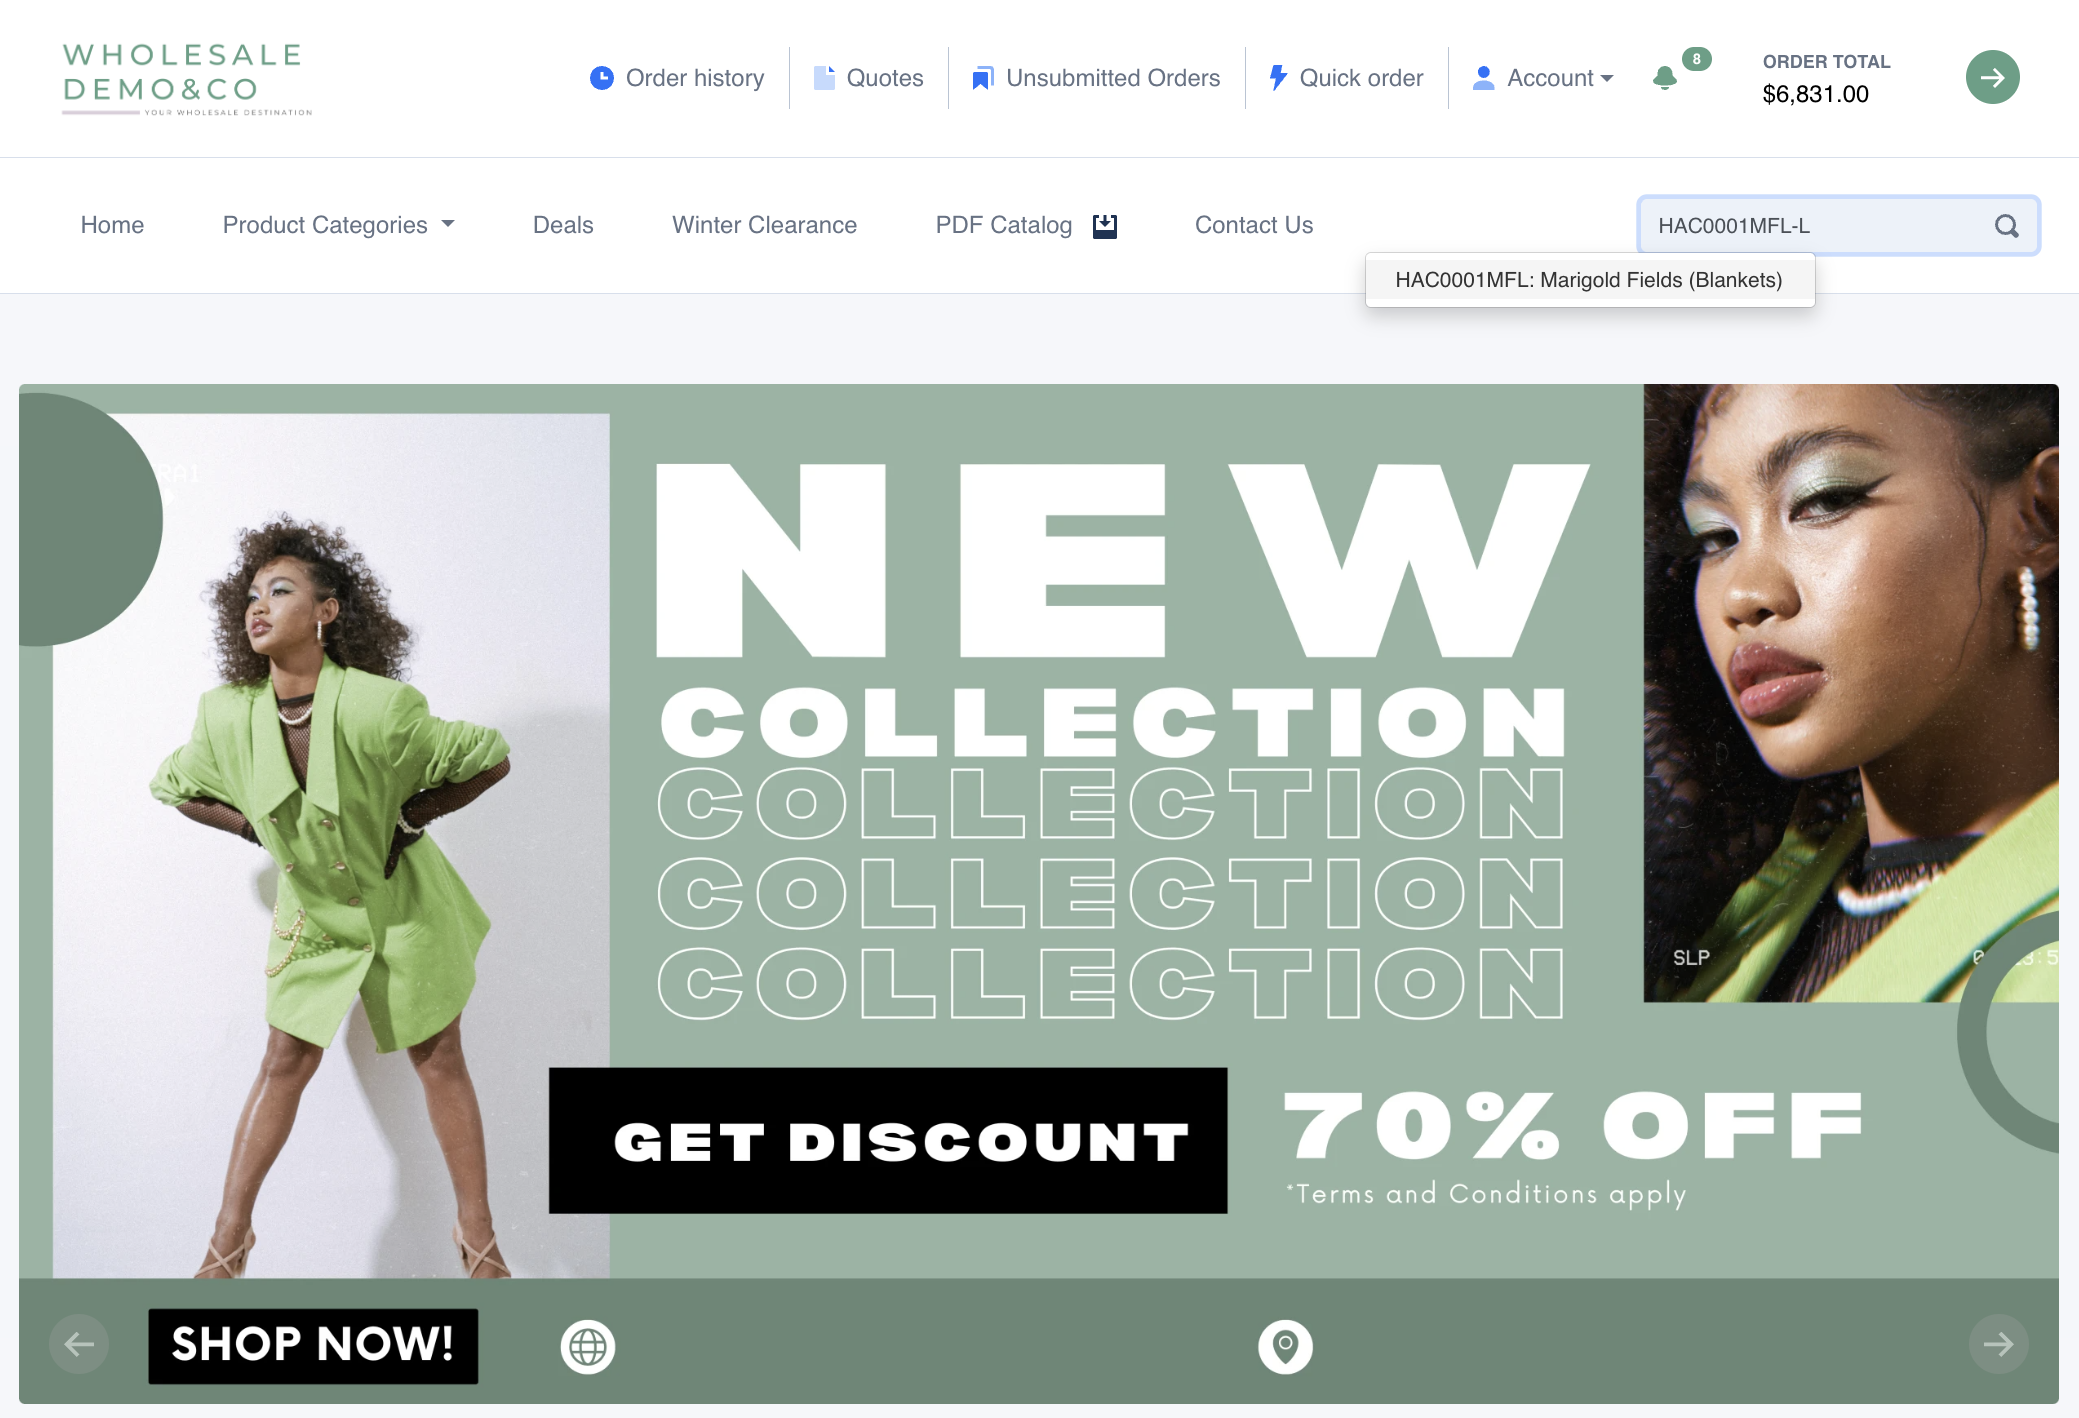
When a buyer enters a variant SKU (e.g., HAC0001MFL-L) in the search bar, the search results will return the relevant product and guide the customer to the correct product page.
NOTE: B2B Wave can support product-level minimum quantity rules across product variants. This allows customers to meet a product’s minimum quantity by splitting the total quantity across different variants. For example, if a T-shirt has a minimum quantity of 10 and comes in multiple sizes, the customer can order 3 small, 3 medium, and 4 large units and still meet the required total.
This functionality must be enabled for your account. Learn more about applying minimum quantity rules across product variants in our dedicated article on creating products.