Personalizing your Storefront
You can customize your B2B storefront to reflect your brand, mission and values, branding strategy, and commercial policy. So let’s see how you can make your B2B Wave eCommerce platform your own.
Editing your B2B Store’s Basic Info
To add and manage the primary information your customers can see on your storefront, such as your logo, company description, language options, country, and timezone, follow these steps:
Step 1. Go to Settings >Profile and click the “Basic Info” tab.

Step 2. Enter the necessary information in the appropriate fields.
Specifically, here you need to specify the following:
| Company name | Add here your company’s name |
| Enter your company’s email (e.g., hello@wholesaledemo.com) | |
| Language | Select your preferred language from the relevant drop-down menu. Remember that the option you select here will reflect on the email notifications you receive through B2B Wave, such as new order confirmations |
| Company description | Type a short description of your company. This description will appear in the “About” section at the footer of your storefront
 |
| Minimum order value | Set the minimum value required for an order, if applicable. By doing so, customers cannot confirm their order if its value is lower than the minimum one you have specified here |
| Country/Timezone | Select the appropriate country and time zone from the drop-down menu |
| Currency | Choose your currency from the drop-down menu |
| Logo | Drag and drop or click on the box to upload your company logo
|
| Email signature | Type the text you want to use in all your email communications through B2B Wave. Remember that you can adjust your text using the available formatting options
|
| Public products | Check this option to allow visitors to view products on your Home page without viewing their prices. Site visitors must log in to access the rest of your store, product pages, and pricing information
 |
| Public pages | Check this box to make your storefront public; this means that customers and unregistered users can browse your B2B portal normally. However, visitors can only view product prices if they log in or register for your store
 NOTE: If you check both the “Public product” and “Public pages” options, site visitors can browse your site and view your product offering. If you leave both boxes unchecked, visitors will only see your login page NOTE: If you check both the “Public product” and “Public pages” options, site visitors can browse your site and view your product offering. If you leave both boxes unchecked, visitors will only see your login page
 |
| Out of stock products status | Select from the drop-down menu you want to display on your storefront when a product runs out of stock (e.g., Pre-order, Sold Out, Not Available) |
Step 3. Click “Save” to store the changes you have made.
Customizing your B2B Store’s Appearance
Once you add your basic info to your B2B Wave account, you can customize your storefront’s appearance to align with your company branding. To do so, complete these steps:
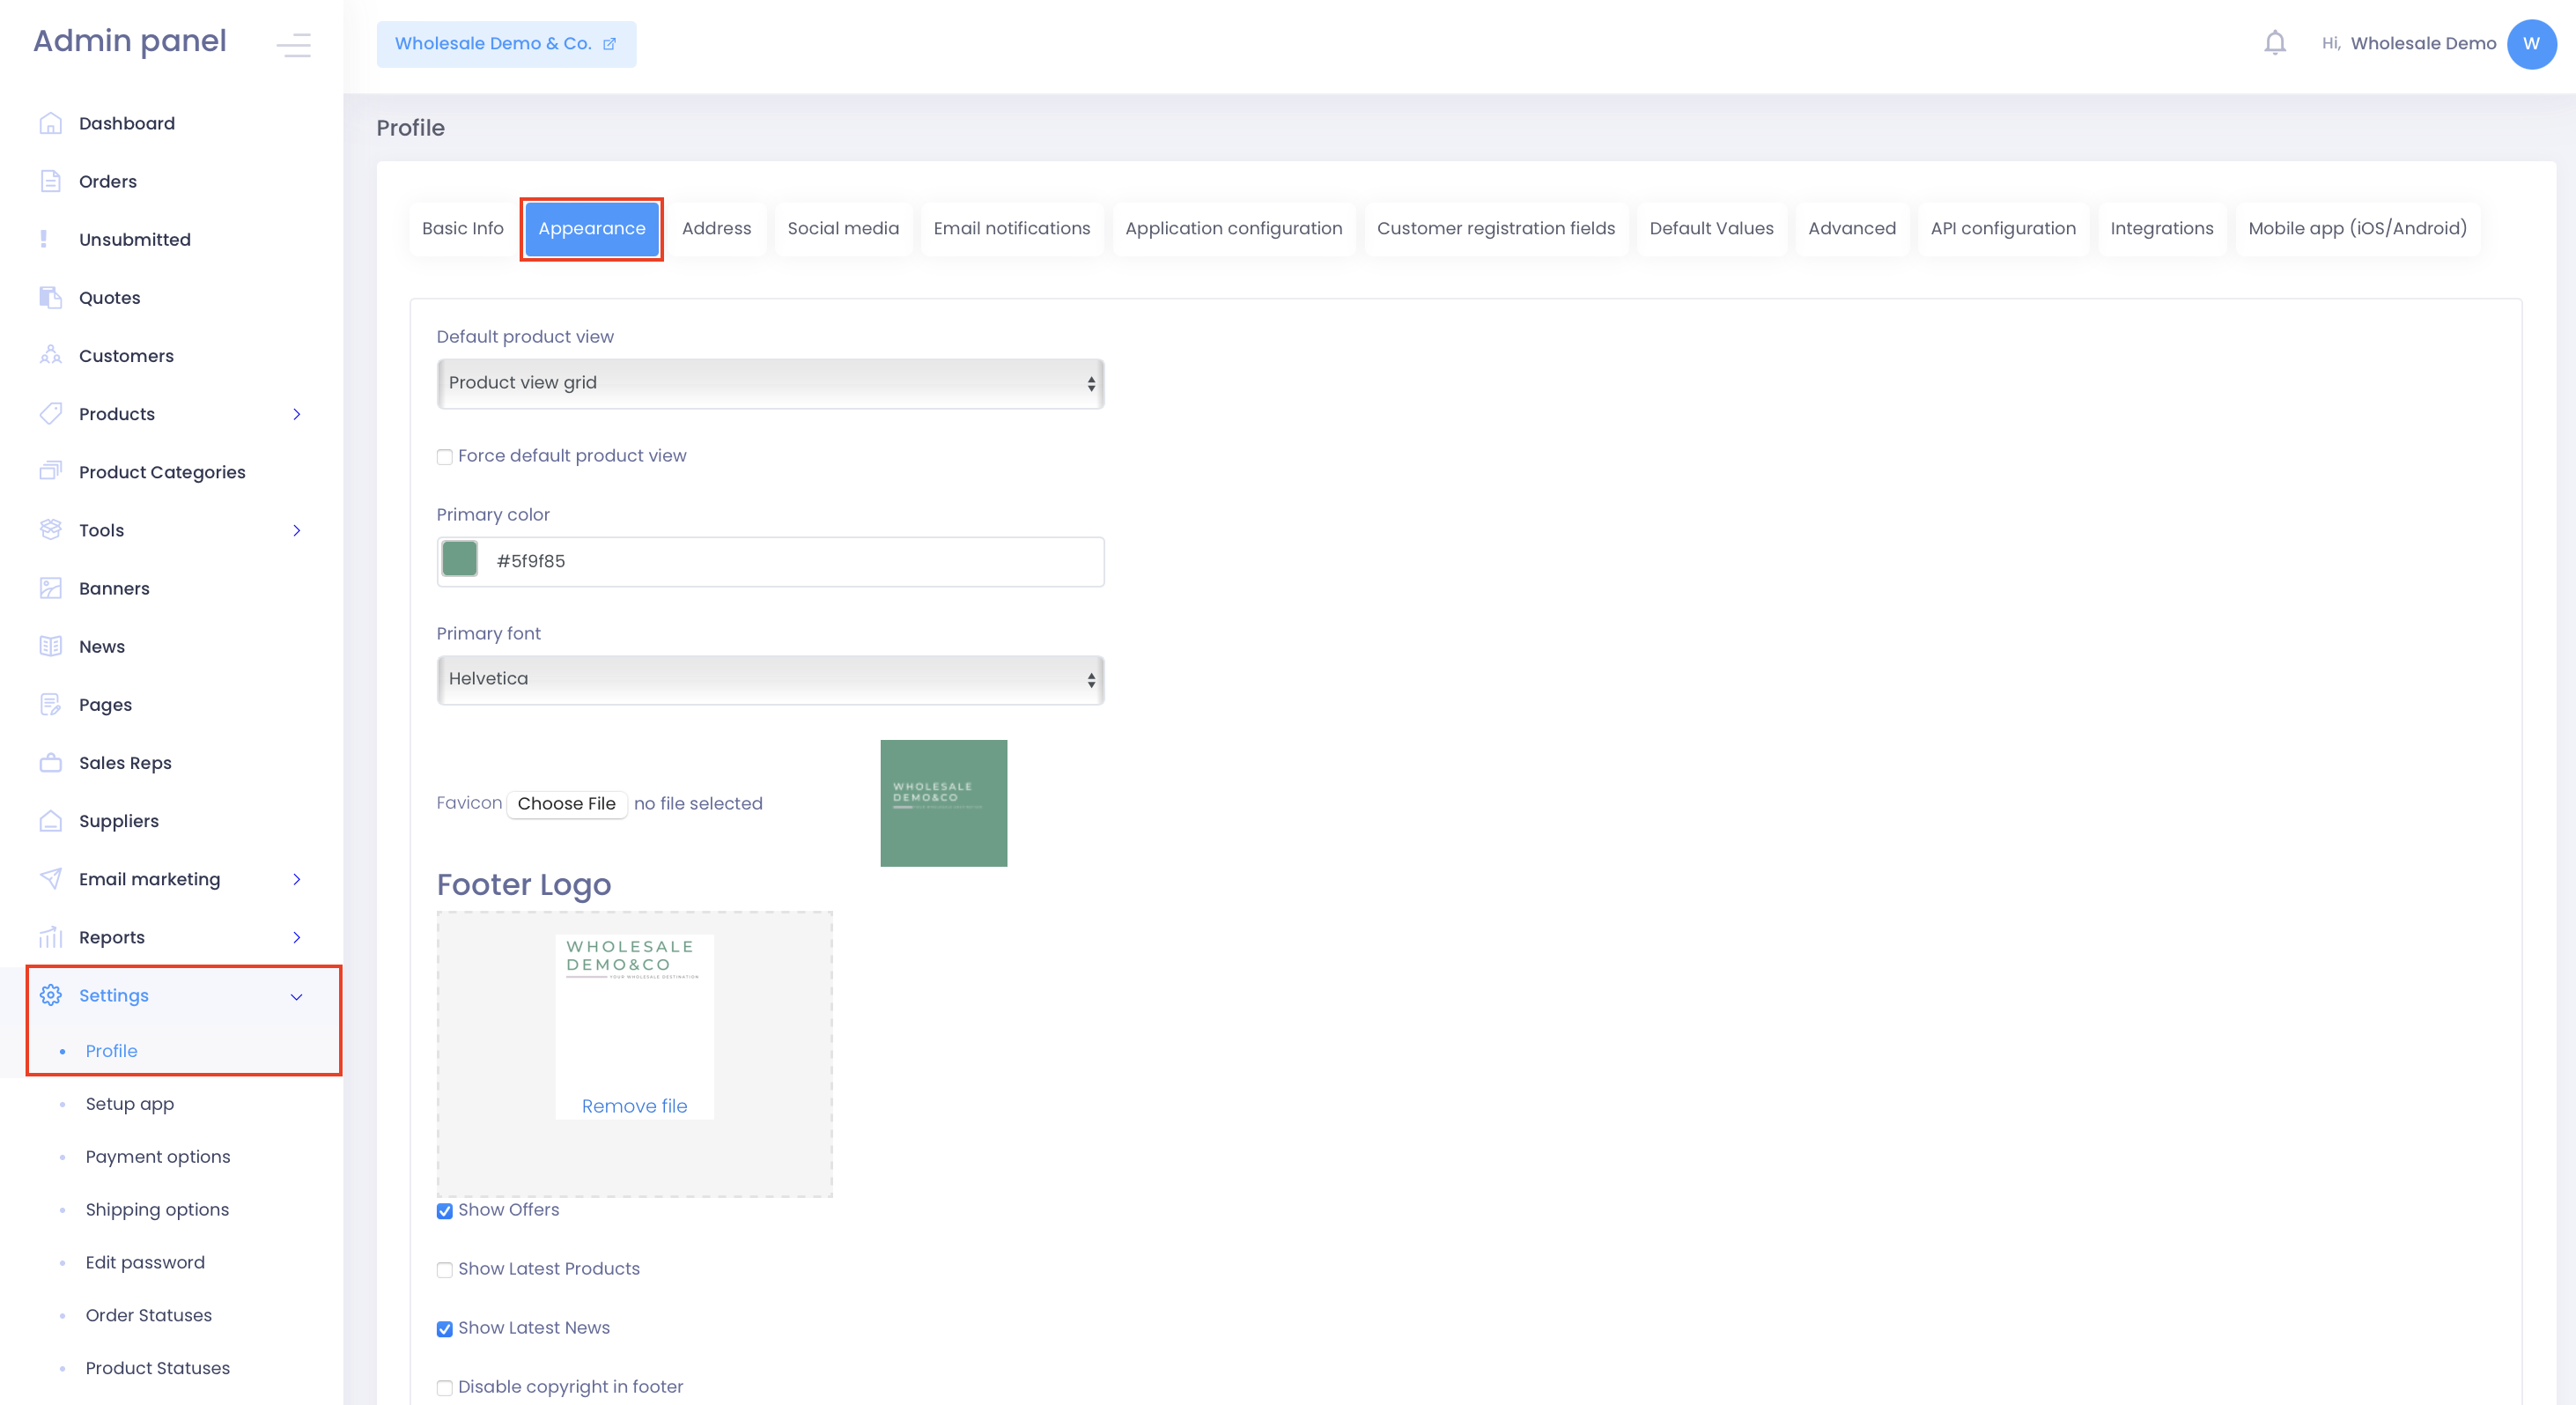
| Default product view | Select if you want your products to appear in a list or grid view from the drop-down menu
List view  Grid view Grid view
 |
| Force default product view | Check the box to fully control the default product view on your storefront. By selecting this option, customers won’t be able to choose how products appear, as the “List” and “Photos” icons will not show on your online B2B store
 |
| Primary color
|
Choose the color of the navigation bar, various buttons, sidebar hover, and more
 |
| Primary font
|
Select the font of the header and the text throughout your site from the drop-down menu
|
| Favicon | Click to upload a custom favicon for your storefront. The favicon will appear on the address bar of your browser when accessing the site or next to the site name in a user's list of bookmarks.
|
| Footer Logo
|
Click to add your logo to the storefront's footer
|
| Show Offers
|
Check this box to enable the Deals (or Offers) page on your storefront. The Deals page appears on your storefront’s header menu and allows your customers to view all products with discounts. Learn more about the main pages on your B2B Wave storefront
 |
| Show Latest Products
|
Check this box if you want the last four (4) recently added products to appear also on a separate section on your storefront’s Home page; otherwise, leave it unchecked
 |
| Show Latest News
|
Check this box to enable the Latest News page in to the header menu on your storefront. Through this page, you can share news and updates about your product list and brands, promotions, or new collections with your customers. All posts you add through the News menu on your Admin panel will appear on this page
 |
| Disable copyright
in footer |
Removes the “Powered by B2B Wave” phrase from the footer section on your storefront |
Step 3. Click “Save” to store your changes.
NOTE: Through this page, you can customize your PDF catalog's look. Read how you can create your PDF catalog.
Adding your Address and Contact Information
Step 2. Fill out the fields with the necessary information and click “Save.”


Adding your Social Media to your B2B Store
You can link your company’s social media accounts to your B2B eCommerce platform by following these steps:
Step 1. Go to Settings >Profile and look for the “Social media” tab.

Step 2. Add your social media links under the appropriate fields and click “Save.” Customers will now see links to these through the footer on your storefront.

Personalizing your B2B store’s Registration Form
You can customize the form customers use to sign up for your store to ensure that you collect all the information you need. To do so, complete these steps:
Step 1. Go to Settings >Profile and look for the “Customer registration fields” tab.

Step 2. Check the fields you want to make mandatory for customers to fill in when registering for your store, and click “Save” to store your options. Remember that the “Sign Up” form will feature the following fields by default: Company Name, Full Name, Phone, Activity, Address, Address Line 2, City, State/Province, Country, Postal Code, Email, Password, and Password Confirmation.
NOTE: You can further adjust your customer registration form through the extra fields functionality.